Please add image or text logo

Follow our simple step-by-step guide to edging your lawn and creating a garden border.
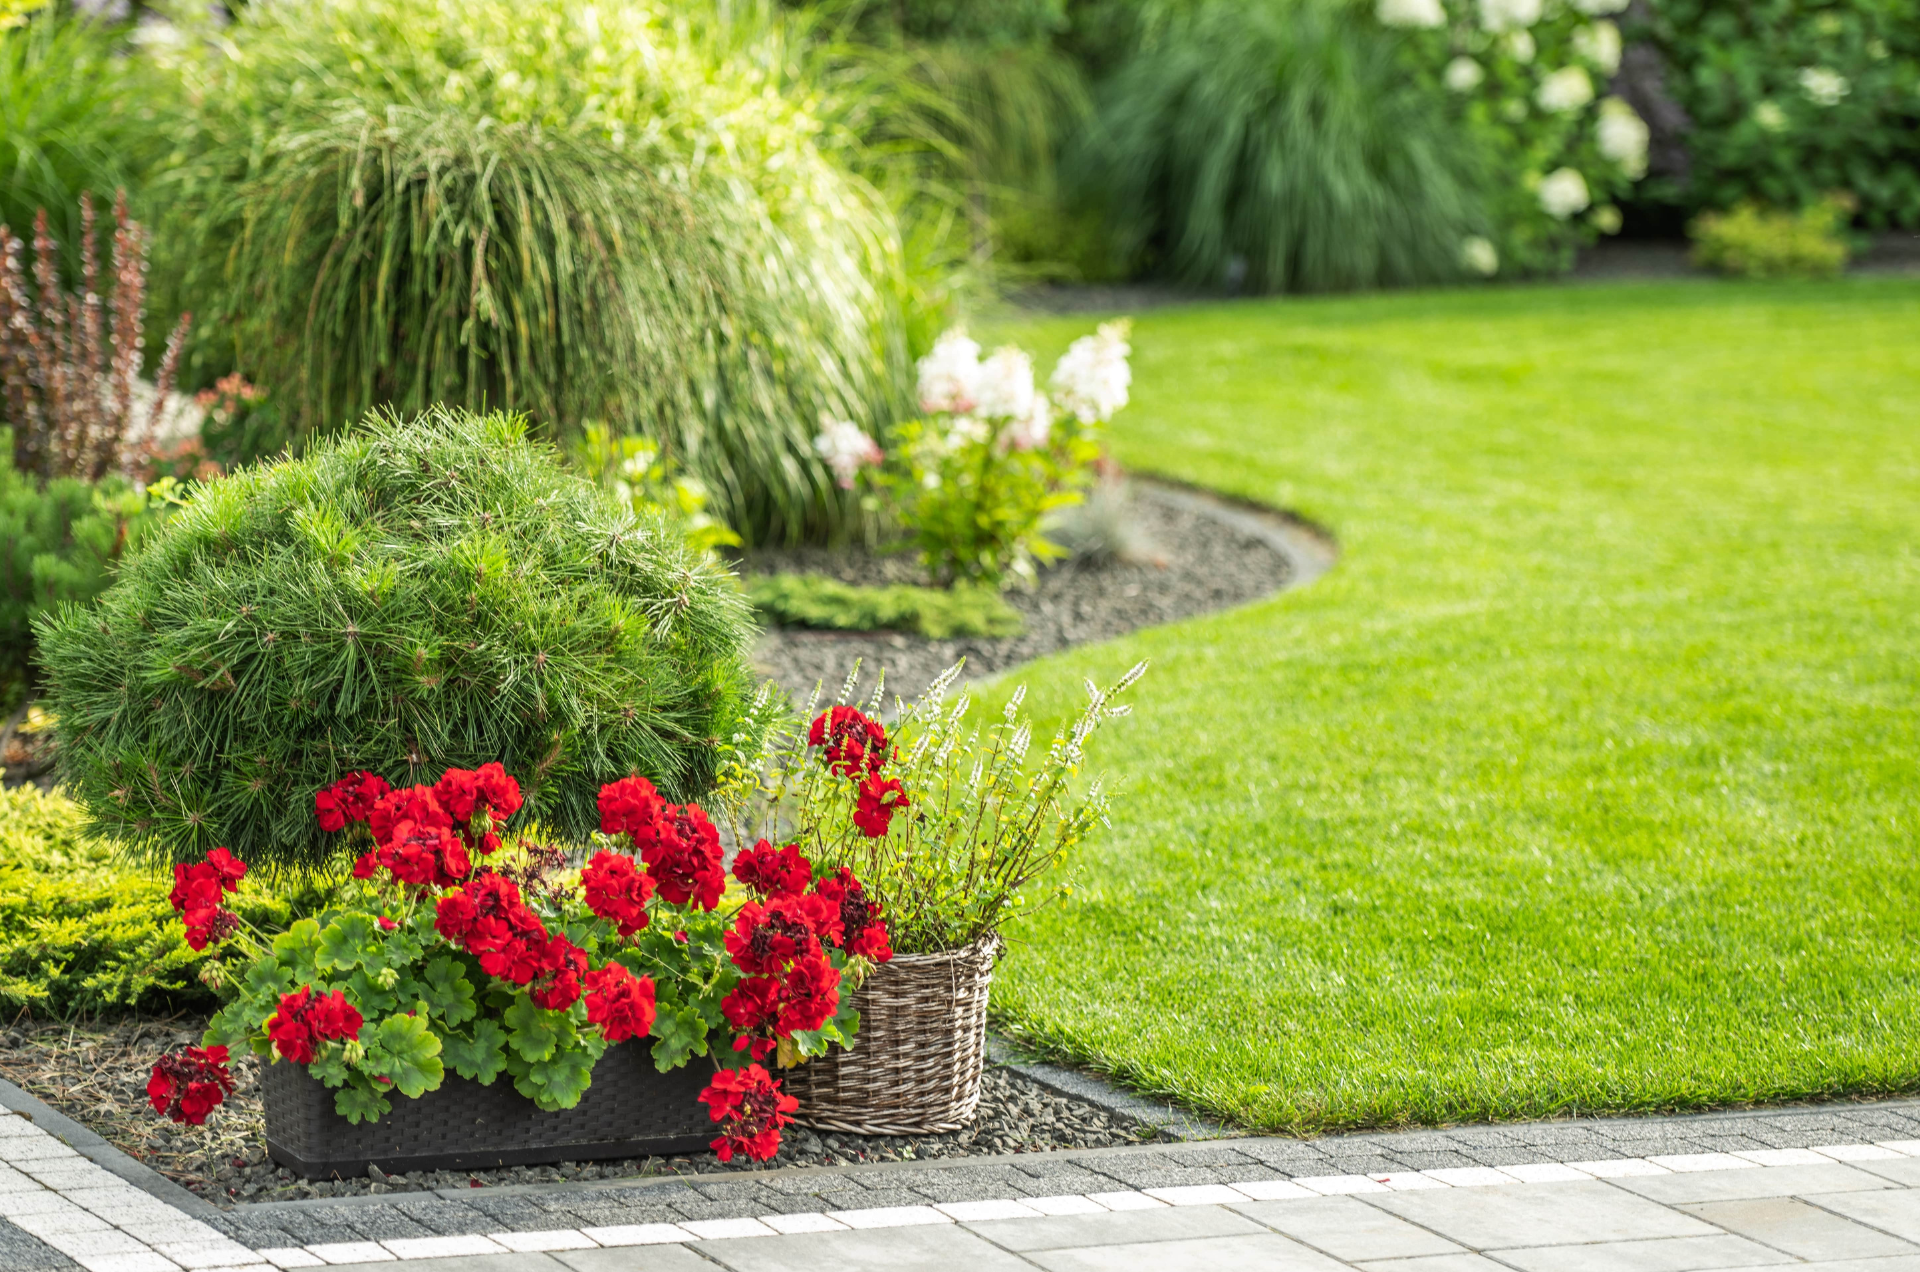
Creating neat lawn edges and well-defined garden borders helps keep your garden looking smart and attractive. It can also prevent grass from intruding into flower beds and other areas you don’t want it.
Whether you’re looking to add sharp, clean lines or a more organic, flowing border, here we’ll walk you through how to edge your lawn and easily create impressive garden borders.
Before you begin, make sure you’ve got:
• A string line – for straight lawn edges
• A garden hose – for curved lawn edges
• Either a half-moon edger or a flat-backed spade – for cutting into your lawn and removing sod to create the edges
• A spade or trowel – for smoothing down soil
• Garden gloves – for removing grass and tidying by hand
• Your border edging materials
Creating a professional looking garden border can be easier than you think, especially if you follow our recommended steps:
Step 1: Decide On The Shape Of Your Border
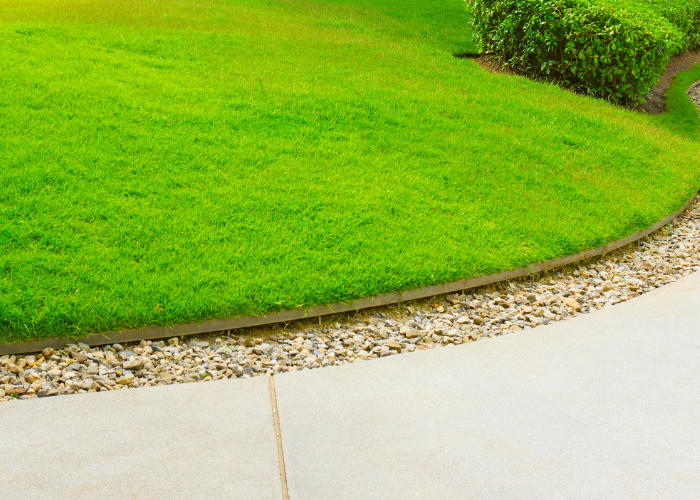
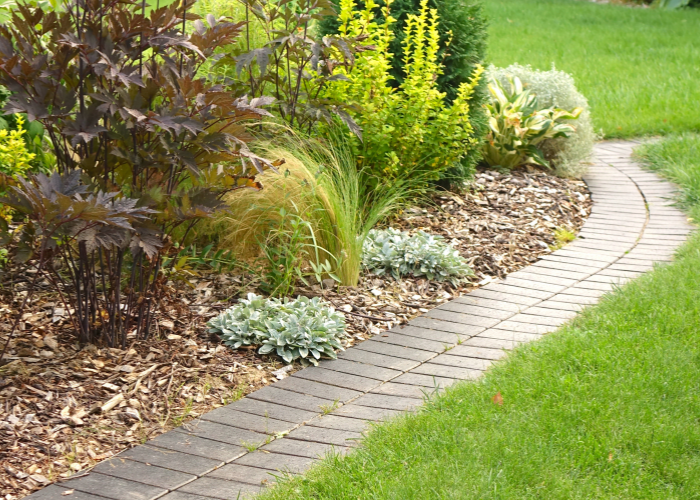
Do you want a straight or a curved border? Straight edges tend to look more formal and create clear breaks, whilst curved borders look more organic and natural.
Which option you choose will be based on your own tastes, but you should also consider how different styles of border will suit the shape and design of your garden.
Step 2: Mark Your Border Out
If you’re making a straight border, mark it out with a string line and pegs. You can use a garden hose if you’re opting for curved borders.
Whilst it might be tempting to play-it-by-ear and do without a guiding marker, it can be all too easy to lose sight of the bigger picture when you’re focussing on edging. Marking your border out is a quick way to avoid any mistakes.
Step 3: Start Cutting Your Border
You’ll create your lawn edge by cutting into and removing the outer areas of grass until you have the border shape you want.
Insert either a half-moon edger or a flat-backed spade into your lawn to pull out the sod and expose the soil below. Try to cut deep enough to remove the full layer of grass, but not too deep that you lose too much soil. Around 3 to 4 inches (about 7.5 to 10 cm) is usually a good depth. If you’re using a spade, you can mark this out on the blade using coloured tape.
Step 4: Work Your Way Along the Border
Slowly and carefully cut along the full length of the line or the curves you’ve marked out. You can overlap each cut a little, to make sure you have a continuous border. Overlapping will make curves smoother.
Step 5: Remove Any Remaining Grass by Hand
Once you’ve cut and checked your lawn edge, and you’re satisfied with it, remove any remaining scraps of grass by hand. You should also pull out any remaining grass or weeds from the beds that run along your border.
Step 6: Prepare the Soil Along the Border
Make sure the soil along your line is flat before you add your border material. You can use a spade or trowel to even it out.
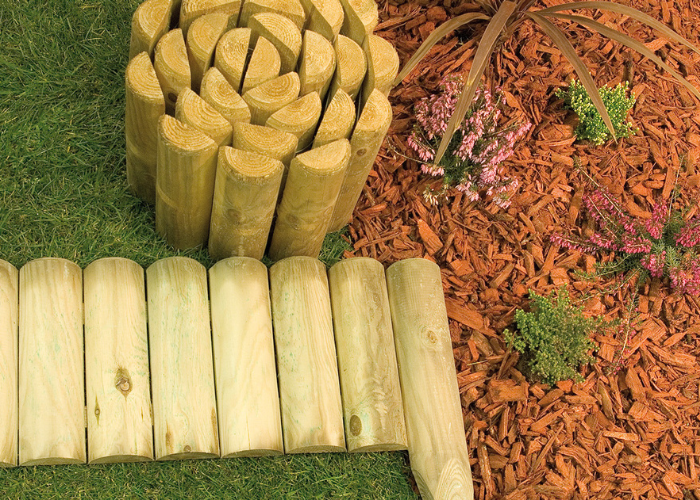
Step 7: Install Your Border Edging Material
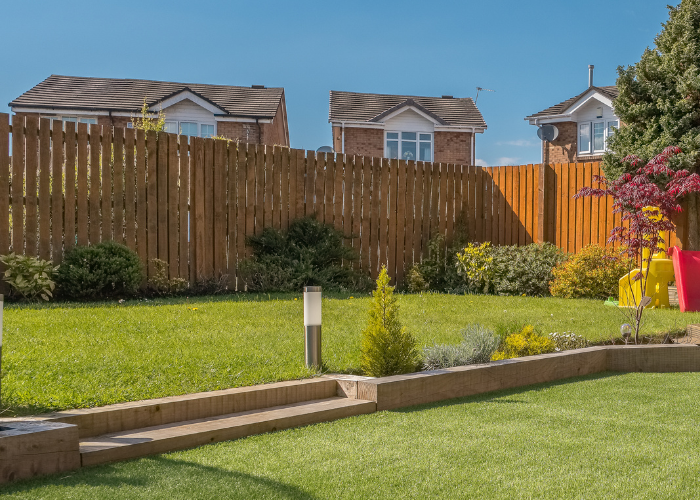
Lay your border material, whether that’s stone, brick, metal or wooden border edging log rolls. The specifics of how you do this will depend on what type of edging you’re using. For some, you may need to dig a small trench or add stakes.
Step 8: Finish Your Border
Once your border edging material is in place, fill any remaining gaps between your lawn and the border with soil or mulch. This will help to stabilise the edging and to create a smooth transition between your lawn and your border material.
You can plant flowers along the soil edge of your border to soften the appearance of it, as required. Consider adding mulch or a decorative aggregate to beds alongside your border to deter grass from growing on the wrong side of it.
Make sure your borders are a success by:
● Keeping it proportional – Ensure your borders are proportionate to the size of your garden. Large, bold edging might overwhelm a small garden, whilst delicate edging could get lost in a larger space.
● Maintain your borders regularly – Keep your lawn edge sharp by regularly trimming grass along the border and stopping any overgrowth in its tracks before it can set in.
● Use mulch or aggregate – Spread mulch or an aggregate material around your plants on beds alongside your borders to stop any grass growing on the wrong side of it.
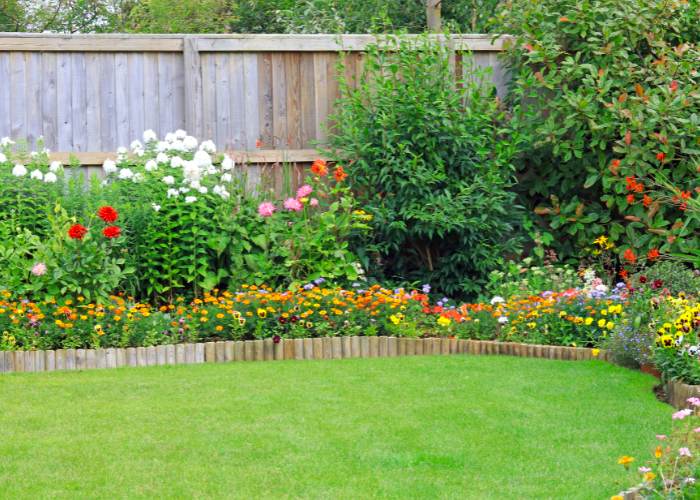
We stock a range of ready-made wooden log border edging rolls and panels that are ideal for creating easy yet attractive garden borders. Our panels and rolls are available in a variety of lengths, with each item pressure-treated to ensure durability and longevity.
See our full garden landscaping range online, and contact our friendly garden experts if you have any questions about our products or border fencing.
Q: How to edge a lawn?
A: Create a border along your lawn by marking out the edges you want with string or a garden hose, and then removing sod using a half-moon edger or a flat-backed spade. Add border edging material, like border log panels, and then fill in any gaps with mulch or soil.
Q: How to edge a lawn next to paving?
A: If you already have paving that defines the border of a lawn, then maintaining an edge can be as simple as mowing alongside it, or cutting grass away using a dedicated edging tool like a string trimmer. If you have a problem with grass intruding onto the paving, or between the cracks of it, you can create a barrier between your paving and your lawn by adding border edging or a line of decorative aggregate.
Q: How to lay sleepers for garden edging?
A: Sleepers used to create garden borders usually won’t require any form of foundation, but it can help to dig a shallow trench to lay them in for added stability. Measure out the area where you want to add your sleepers, and clear it of grass and other plants. Dig a trench a few inches deep. Add sand or gravel, then lay a waterproof membrane across the exposed soil to protect your sleepers from moisture damage, before placing them.
Q: How to install log roll edging?
A: The exact way you install log roll edging will depend on the type of edging you have, but broadly speaking, you should cut away grass with a half-moon edger or a flat-backed spade to create an edge along your lawn. Dig a small trench, if required, and then add your log roll edging. Secure it using a wooden mallet, or drive in any stakes, as required. Add soil or mulch to fill in any gaps.

Sales and advice ![]() 01924 830055
01924 830055